How do I create a group in the address book?
How do I create a group in the address book?
Create contact groups (also known as distribution lists or contact lists) to organize and manage contacts more easily. Use a contact group to send an e-mail to several people.
If you regularly send e-mails to the same group of recipients or to a group of people, you can, for example, specify the group in the address field when writing an e-mail instead of having to add each recipient individually.
Examples of recipient groups: Association members, addresses within a company, people with common interests, etc.
How do I set up a group?
Create group directly in contact
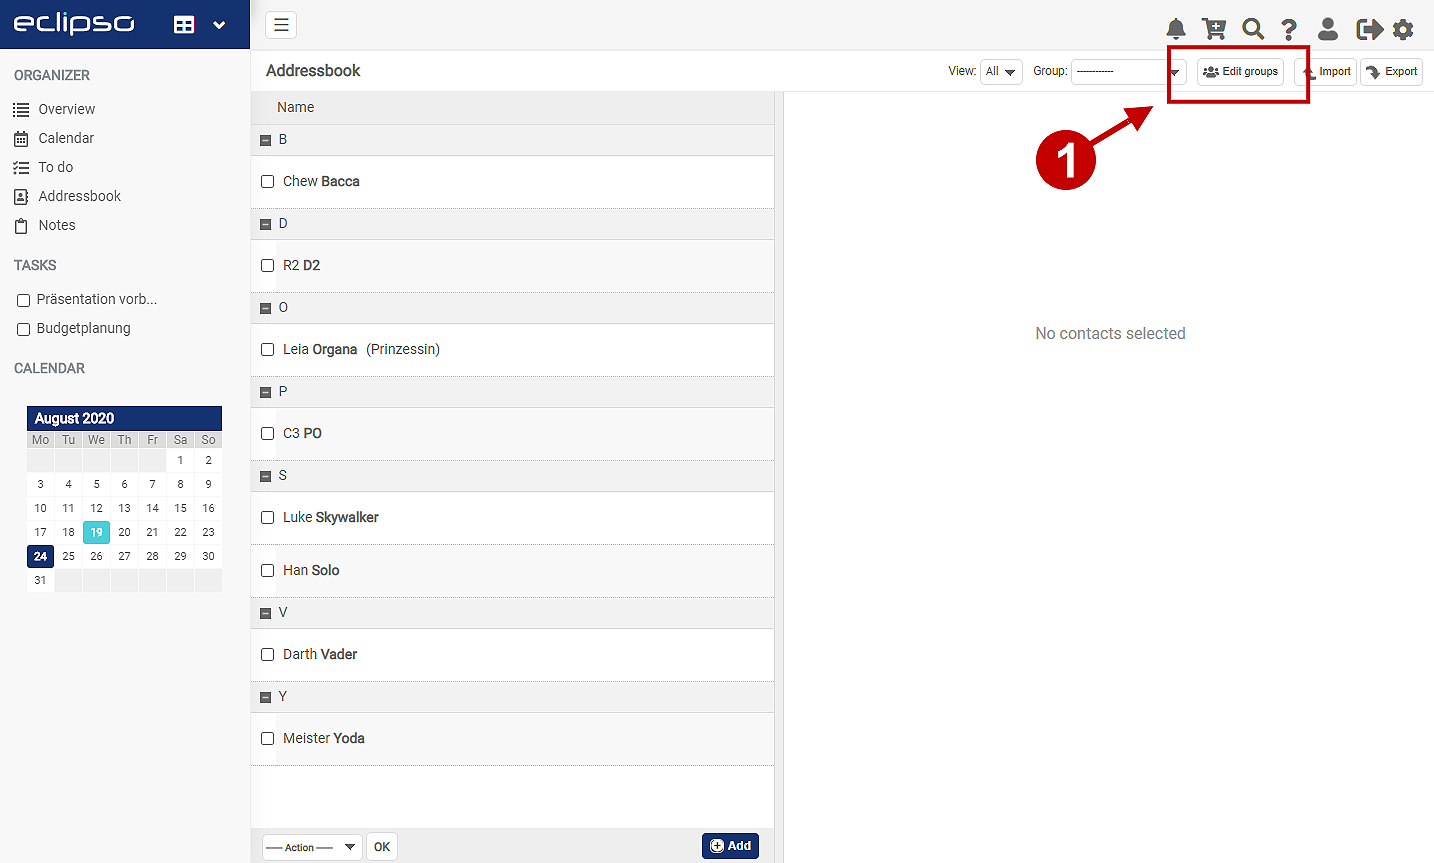
- Open the Address book in the desktop version
- Tap on Edit groups in the top right-hand corner (1)
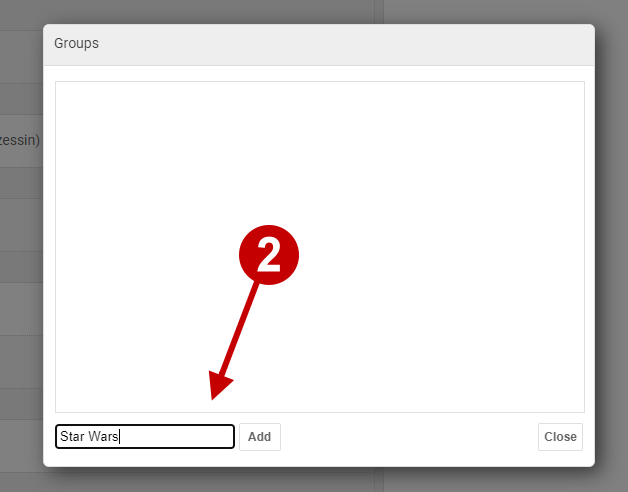
- First enter a name or a name for the group (2) and save the entry with Add
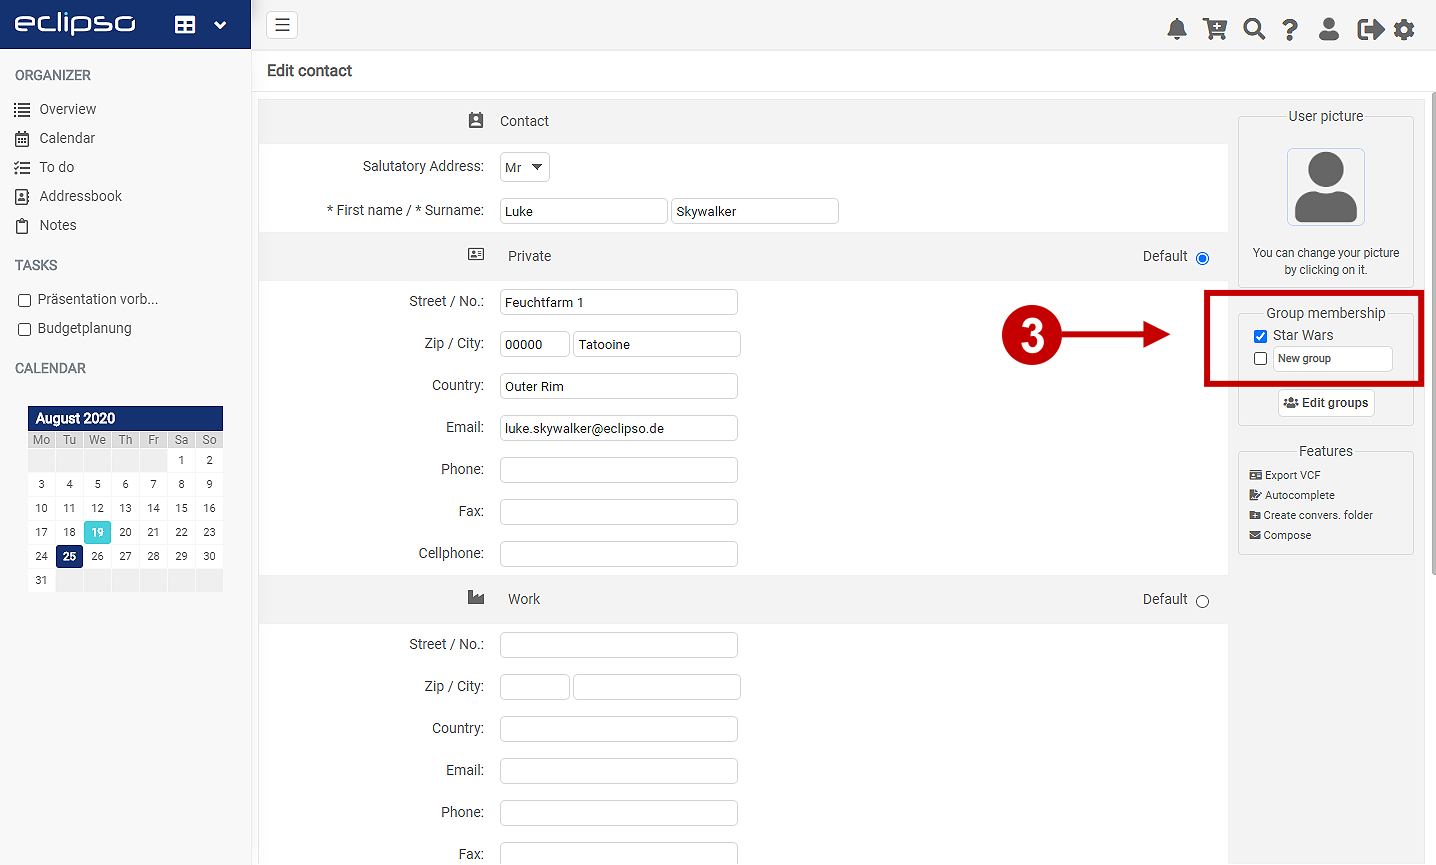
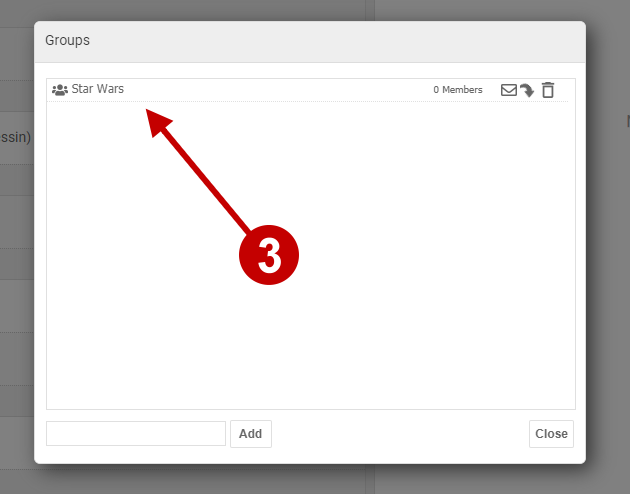
- After the group has been saved, it is displayed in the group dialog (3)
- Done: The group is created
- Another time-saving way to create a group is to use the menu Edit contact.
- Open a contact in the address book (edit contact)
- Enter the new group name in the field New Group (4) on the right
- Finally, click on OK to save the entries
- The group has now been created
- Tip: To assign the contact directly to a group, activate the checkbox next to the group you want to assign to the contact
- Groups are assigned a unique identifier within the system, which always consists of the name you have chosen combined with a system-specific identifier. For example, if you assign the group name "Team," the group will be created using the following format: "Team"<12345@contact.groups>

Drafting an email to a group
- Open the email menu and click "Compose" in the top-left corner.
- Type the name of your contact group into the "To" field.
- Select the appropriate suggestion that appears from your address book. Example: "Team" <12345@contact.groups>
- Enter a subject and the body text, then click "Send email."
Related articles: